When Baltimore Center Stage, the city’s largest professional theater company, set out on its dramatic $28 million transformation, it tasked Masque Sound, a leading theatrical sound reinforcement, installation and design company, to supply and install a custom audio equipment package for its Head Theater. Now, as the year-long renovation comes to a completion, Masque Sound, in collaboration with theater and acoustic consultants Charcoalblue, is proud to unveil the theater’s new state-of-the-art audio system. Read More…
MASQUE SOUND’S CUSTOM AV INSTALLATION AT THE MORGAN SCHOOL
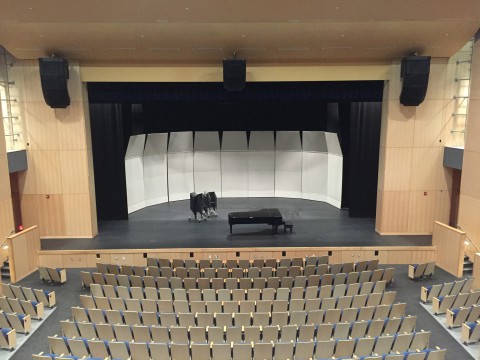
When officials in Clinton, Connecticut determined that a renovation on the area’s aging public high school, The Morgan School, would cost more than a rebuild, a new 140,000-square-foot building was constructed. Officials relied on JaffeHolden Acoustics Inc. and Masque Sound, a leading theatrical sound reinforcement and installation company, to design and outfit the school’s auditorium, gym, and lobby with the latest AV technology to meet today’s standards. Read More…
MASQUE SOUND & NATASHA, PIERRE & THE GREAT COMET
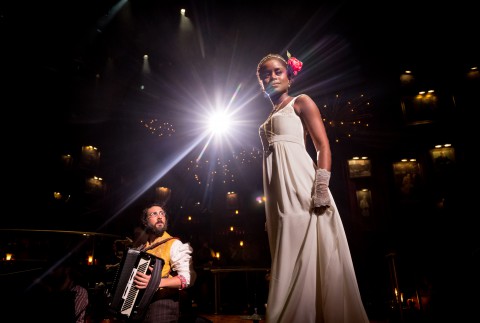
When Broadway’s Imperial Theatre was transformed for the 360-degree musical, NATASHA, PIERRE & THE GREAT COMET of 1812, Sound Designer Nicholas Pope was presented with some serious audio challenges. To start, he had the daunting task of delivering an exceptional sonic experience to everyone in attendance at what is a uniquely laid out theatre. To help him meet some of the show’s hefty audio demands, he turned to Masque Sound, a leading theatrical sound reinforcement, installation and design company, for a custom audio equipment package.
“I’m quite certain no sound system like the one that Nicholas Pope designed and Masque Sound supplied has ever been incorporated into a Broadway musical,” said Sonny Paladino, Music Supervisor for NATASHA, PIERRE & THE GREAT COMET OF 1812. Read More…
MASQUE SOUND CONTINUES BROADWAY RUN WITH FALSETTOS
William Finn and James Lapine’s groundbreaking, Tony Award®- winning musical, Falsettos recently made its triumphant return to Broadway’s Walter Kerr Theatre. In an all-new production from Lincoln Center Theater, veteran Sound Designer Dan Moses Schreier had a chance to reunite with a show that he had been so intimately involved in during its original creation 30 years ago. It also provided Schreier the opportunity to once again collaborate with Masque Sound, a leading theatrical sound reinforcement, installation and design company, to create a custom audio equipment package for the highly anticipated revival. Read More…
MASQUE SOUND MAKES HEADLINES WITH THE REVIVAL OF FRONT PAGE
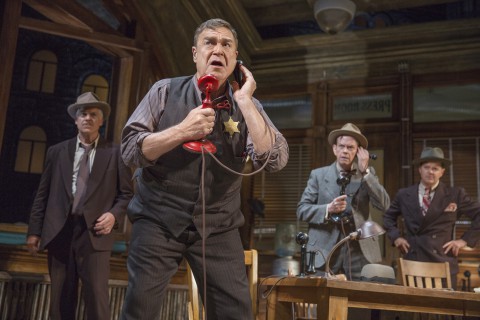
When the 1928 comedy classic The Front Page, from Ben Hecht and Charles MacArthur, fired up the presses for its highly anticipated Broadway revival at the Broadhurst Theatre, Masque Sound, a leading theatrical sound reinforcement, installation and design company, made headlines with its custom audio equipment package for the star studded play. Read More…
MASQUE SOUND’S RETROFIT AT MANHATTANVILLE COLLEGE’S O’BYRNE CHAPEL
When the administration at Manhattanville College made the decision to invest in an audio upgrade retrofit to the campus’ beautiful O’Byrne Chapel, they turned to Masque Sound, a leading theatrical sound reinforcement and installation company, for the purchase and install of the facility’s new audio equipment. Read More…
Wireless Mic Techniques for Production
Other Mic Placement Techniques
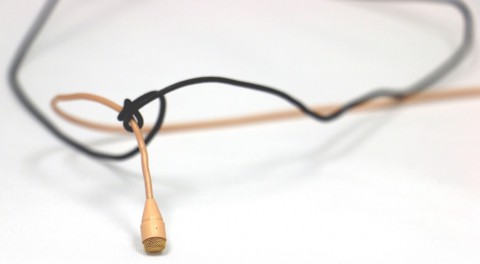
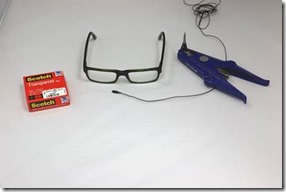
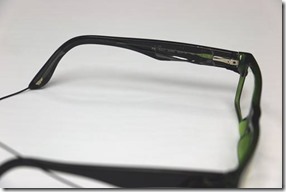
Depending on the actor, the aesthetic, their wardrobe and personal preference, the mic element may need to placed elsewhere. One such example is a bald actor who wears glasses throughout the show. A small mic such as a Sennhesier MKE1 is ideal for unobtrusive rigging on a pair of glasses.
To build the glasses rig, the only supply you’ll need is scotch tape, but a Hellerman tool
and sleeves will help to make the rig more permanent.
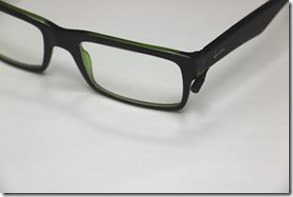
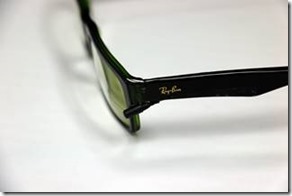
The placement of the mic capsule will depend on the individual, but there are some interesting physics effects that can happen with a pair of glasses. The lens of the glasses can act as a boundary surface, similar to a PZM microphone, that will enhance the high frequency content reaching the capsule. How much the mic capsule sticks out from the edge of the glasses frame will all depend on personal preference. We will demonstrate one way of creating the glasses rig.
This example simply uses tape along the inside edge of the glasses frame.
Check back with Masque Sound for more on sound and the sound industry! If you have suggestions for our team, topics you’d like to see covered, or just want to let us know how we’re doing so far, please reach out!
Wireless Mic Techniques for Production
The Ear Rig & Practical Mic Placement
While the halo rig and toupee clip rig are popular means of forehead mic placement in theater production, situations will arise that make these rigs less than ideal or impossible. In these instances, placement may be achieved using the ear, glasses, hat, or other costume accessory.
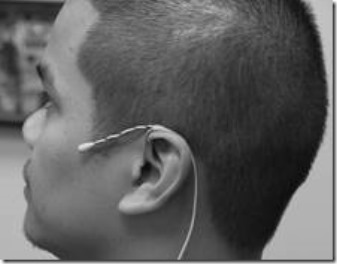
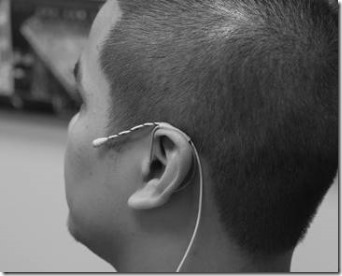
An ear rig is a great placement solution for a bald actor, a character who wears a hat on and off repeatedly throughout the show or if that actor is required to use or move their head frequently, potentially disrupting the forehead mic placement. This rig requires, at minimum, an ear loop to mount the microphone to, Hellerman sleeves and floral wire.
In order to help make the rig almost invisible, you will also need art supplies such as paint, markers, stain, and tape.
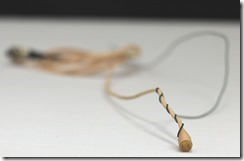
For an ear rig, the mic wire needs to be stiffened in order for the mic placement to remain consistent since the microphone wire itself is used to get the element into position. You start by wrapping floral wire around the mic wire about 2” from the mic capsule.
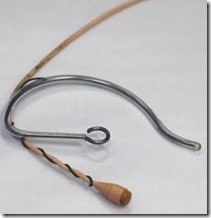
The next step requires an ear loop. There are two types generally used, the metal loop covered with plastic, and the fully nylon loop. You can also make your own from a coat hanger or other thin metal, but for the price, the pre-made loops can’t be beat. Ear loop use varies significantly among Broadway A2s; some prefer to cut the eye off the top of the loop, some like to have the loop bend completely around the bottom of the ear to keep it in place, some like to bend a straight piece down from the bottom of the loop to make it easier to tape in place, some like to build a small internal armature to make the rig stay in place better on the actor. In this example, we will display the simplest method that is in use on Broadway.
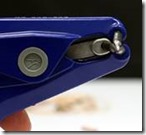
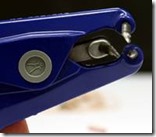
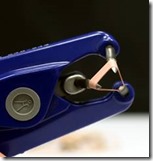
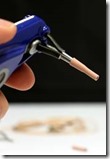
You will need a Hellerman tool and sleeves in order to build this rig properly. If you don’t have experience with a Hellerman tool and sleeves, it may be a bit overwhelming. The concept is simple; the sleeves may be stretched over anything that needs a rubberized finish, or to join two pieces together, similar to heat shrink tubing, but much more versatile. The Hellerman tool stretches the sleeve open so that items can be fed through the middle of the sleeve, then the sleeve is slipped off the open jaws onto the pieces that are fed through.
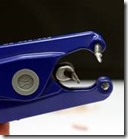
The jaws open by squeezing the handle:
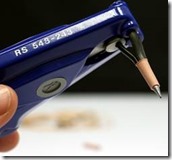
In order for the sleeve to slip onto the jaws in the closed position and make it easy for the sleeve to come off the jaws, use a lubricant.
This can be the standard RS Components sleeve lubricant, hand sanitizer, or if you are really desperate, spit.
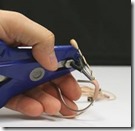
After the jaws are lubed, slide the sleeve onto the jaws and begin opening them up.
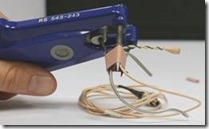
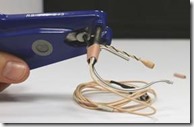
To build the ear rig, thread the mic capsule and ear loop through the opened Hellerman sleeve, and slightly close the jaws
(don’t pinch the mic wire!). Then gently pull the sleeve off the jaws and onto the rig.
The rig can be held in place with a small bit of tape behind the ear over the ear loop.
The cable can be hidden and dressed in any number of ways using tape, wig clips or paint.
When a halo or toupee clip rig are not sufficient or possible, utilizing the ear rig or an appropriate prop clip is often a viable solution. Tune in next week to wrap up our wireless microphone technique series (for the time being!), and please be sure to submit any questions, comments, or suggestions to the Masque Sound team!
Wireless Mic Techniques for Production
The Toupee Clip Rig
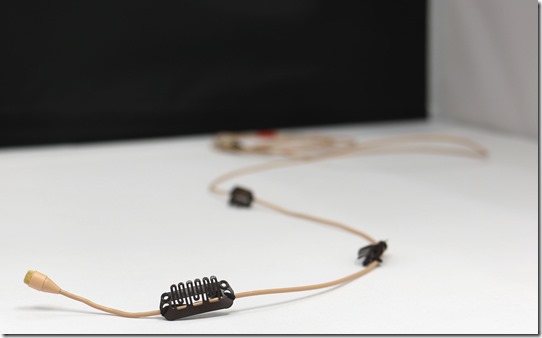
If a halo rig is not consistent enough, or too hard to hide, a toupee clip rig is used. This rig normally uses three toupee or wig clips which attach to the mic cable using elastic and are hidden in the actor’s hair, near the scalp. The mic wire is run from the forehead, straight back over the top of the actor’s head, and down the back, hiding the wire under the actor’s hair and costume. This rig is most suitable on men with longer comb over hairstyles.
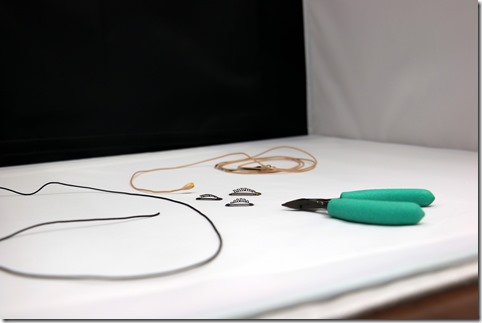
Toupee or wig clips are available in three colors (black, brown and beige) and are made in small, medium and large sizes. A large clip offers the most secure placement, but is the hardest to hide in an actor’s hair. Choose the clip based on the actor’s hair length and color. Depending on the actor’s hairstyle, you might use more than one size on the same rig.
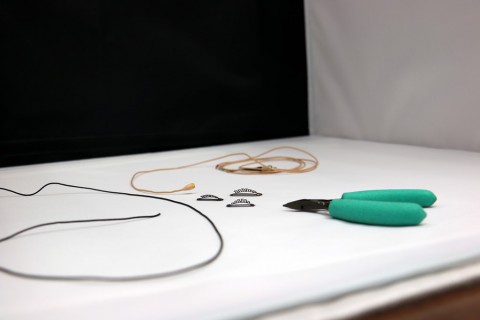
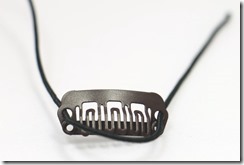
The wig clip can be attached to the mic wire in a number of ways. The most common way is with a piece of elastic strung through the holes of the clip and twisted one or more times before tying the knot tight. The mic wire can easily be threaded through the elastic twist and it is held tightly, yet offers some movement if the clips need to be slid in place.
Follow the simple photo series below below to string a wig clip with elastic and install it on the mic wire, then to position and conceal the rig on the actor’s head.
Required Supplies:
Step One: Loop elastic through the clip ends.
Step Two: Tuck one end through the looped elastic to create a twist.
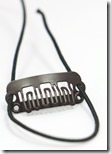
Step 3: Tie the elastic, then move to the underside of the clip.
Completed Clip:
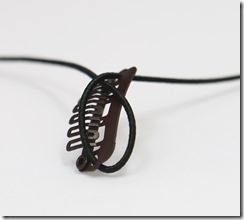
Step Four: Thread the microphone through the elastic so the clip is parallel to the mic wire.
Mic Rig Installation
Fitting the microphone on the actor will take some practice to get
the placement perfect and to hide the mic wire sufficiently.
Step One: Using a rat tail comb, create a part in the actor’s hair.
Step Two: Once a clean part has been made, drape the mic over the actor’s head, laying the mic through the part.
Set the front clip (nearest to the capsule), just behind the hairline.
Step Three: Set the next clip on the crown of the actor’s head, avoiding their natural part or any bald area.
Setting the clip securely is more important than hiding the wire at this point.
Generally it is possible to slide the mic wire inside the clips after the clips are set.
Step Four: The third clip is set on the back of the actor’s head.
The placement of this last clip depends on the actor’s hairstyle and can be close to the neckline in the center, or to the left or right of center.
Placement will depend on the actor’s and the production’s needs, costumes, and hair style.
Step Five: After the clip is set, use the comb to pull the hair out from underneath the mic wire in order to hide it.
Typically, the mic wire will be colored to match the actor’s hair color, and just the mic capsule will be peeking out from the hairline. The final touch is a piece of tape on the actor’s neck perpendicular to the mic wire to secure it in place.
Depending on the timbre and output of the actor’s voice, placement may vary, but this example is a typical placement.
The toupee clip rig works well on actors with longer hairstyles, in situations where a halo rig might be difficult to hide, or when the mic rig needs to offer more consistency. Questions, comments, and suggestions can be sent to the Masque Sound team – our next post will cover mic placement using the ear rig!
Wireless Mic Techniques for Production
Introduction
In “Wireless Mic Techniques for Theatrical Production” we’ll investigate commonly used methods in theater for miking actors with wireless elements. As with much of the knowledge in the theater sound community, documentation is light and information is passed from technician to technician, so consider Masque Sound’s guide just that, a guide. If you have tips, tricks, or suggestions you’d like us to test and add to our guide, drop us a line!
When competing with high volume music and sound effects in musicals and plays, vocal reinforcement can be difficult. In order to accomplish the quality and level of audio necessary, actors are often fitted with their own microphone and wireless transmitter when on stage. Keep in mind, softer performances may not require this type of mic placement and those placements will not be discussed in this series.
The ideal mic placement on an actor is one that is almost invisible, is not changed by the direction the actor faces, and sounds as clear and consistent as possible. To conceal the microphone and wire, making it almost invisible, a variety of “arts and crafts” techniques are used, including painting, dyeing, taping, and others. In order to maintain the mic’s relative position to the actor’s mouth, the mics are mounted on their head in a variety of positions. Clarity and consistency of sound is by achieved through trial and error – the microphone will respond to variations to each actor’s voice differently.
In theater, there are a variety of mic placements, but it is generally accepted that the best sounding placement is with an omnidirectional element on the forehead, just below the hairline where vocal resonance is created from the forehead and sinus cavity. Mic placement as low as the bridge of the nose, and as far to the left or right, directly above the eye is not uncommon. Generally, the closer to the mouth the mic is placed, the louder and closer sounding the audio is. Each actor’s mic placement is situational, with the timbre and volume of the voice dictating where the mic is placed.
At times, based on an actor’s, director’s, or wardrobe issues, placement is less than traditional. One such placement is over the ear which relies on the actor’s cheekbone for resonance instead of the forehead/ sinus cavity. The microphone will peek out an inch or two beyond the ear canal and follow the cheekbone line. If an actor’s costume wardrobe allows, mic placement may be achieved through eyeglass, hat, and lapel mounts, among others.
Wireless mic placement could be considered an artform, and responsibility generally falls to the show’s A2, with direction from the A1 and sound designer. “Wireless Mic Techniques for Theatrical Production” aims to document the most commonly used techniques in an effort to help all theaters and artists produce the highest quality sound and shows possible. To purchase any of the equipment featured in this series, reach out to Masque Sound’s experts with questions and comments!
Over the next few weeks, we will be publishing tutorials and descriptions of these methods, so stay tuned.








![clip_image002[6] clip_image002[6]](https://www.masquesound.com/wp-content/uploads/2016/08/clip_image0026_thumb.jpg)
![clip_image002[8] clip_image002[8]](https://www.masquesound.com/wp-content/uploads/2016/08/clip_image0028_thumb.jpg)
![clip_image004[4] clip_image004[4]](https://www.masquesound.com/wp-content/uploads/2016/08/clip_image0044_thumb.jpg)
![clip_image002[10] clip_image002[10]](https://www.masquesound.com/wp-content/uploads/2016/08/clip_image00210_thumb.jpg)
![clip_image002[12] clip_image002[12]](https://www.masquesound.com/wp-content/uploads/2016/08/clip_image00212_thumb.jpg)
![clip_image002[14] clip_image002[14]](https://www.masquesound.com/wp-content/uploads/2016/08/clip_image00214_thumb.jpg)
![clip_image004[6] clip_image004[6]](https://www.masquesound.com/wp-content/uploads/2016/08/clip_image0046_thumb.jpg)
![clip_image002[16] clip_image002[16]](https://www.masquesound.com/wp-content/uploads/2016/08/clip_image00216_thumb.jpg)
![clip_image002[18] clip_image002[18]](https://www.masquesound.com/wp-content/uploads/2016/08/clip_image00218_thumb.jpg)
